Migrating from Lens Studio to Effect House
If you're coming from Lens Studio, this guide will help you get started with Effect House by translating familiar features, UI, and workflows.
While many capabilities are similar, you'll notice key differences in areas like visual scripting, materials, and editor layout. This guide highlights those differences so you can quickly adapt your existing knowledge to Effect House.
Terminology Mapping
Many tools in Effect House work the same as Lens Studio, but use different names.
Use this table as a quick reference when navigating the editor:
| Lens Studio | Effect House |
|---|---|
| Scene Hierarchy | Hierarchy |
| Asset Browser | Assets |
| Inspector | Inspector |
| Logger | Console |
| Scripts / Behavior / Tween | Visual Scripting / Interaction Components |
| Shader Graph | Material Editor |
| VFX Graph / GPU Particles | Visual Effects Editor / Basic Particles |
| Asset Library | Asset Library / AR Library |
| Sample Projects | Templates |
| EnvMap | Environment |
| User Context System / Social Kit | Social Kit |
| Head Binding | Head Tracker |
| Upper Body Tracking 3D | Neck Tracker |
| 3D Body Tracking | Body Tracking 3D |
| Avatar | Body Drive |
| Target Tracker | Image / Marker Tracking |
| Perspective Camera + Device Tracking | AR Plane |
| Uber Diffuse | Standard Material |
| Uber PBR | Standard PBR |
| Face Paint | Face Mask |
| Segmentation Texture | Segmentation |
| Render Target | Render Texture |
| Orthographic Camera | 2D Camera |
| Screen Text / Text3D | Text / 3D Text |
| Audio | Audio Player |
Navigate the Editor
Effect House uses a panel-based layout similar to Lens Studio. You can drag panels to customize your workspace or reset them from the top toolbar.
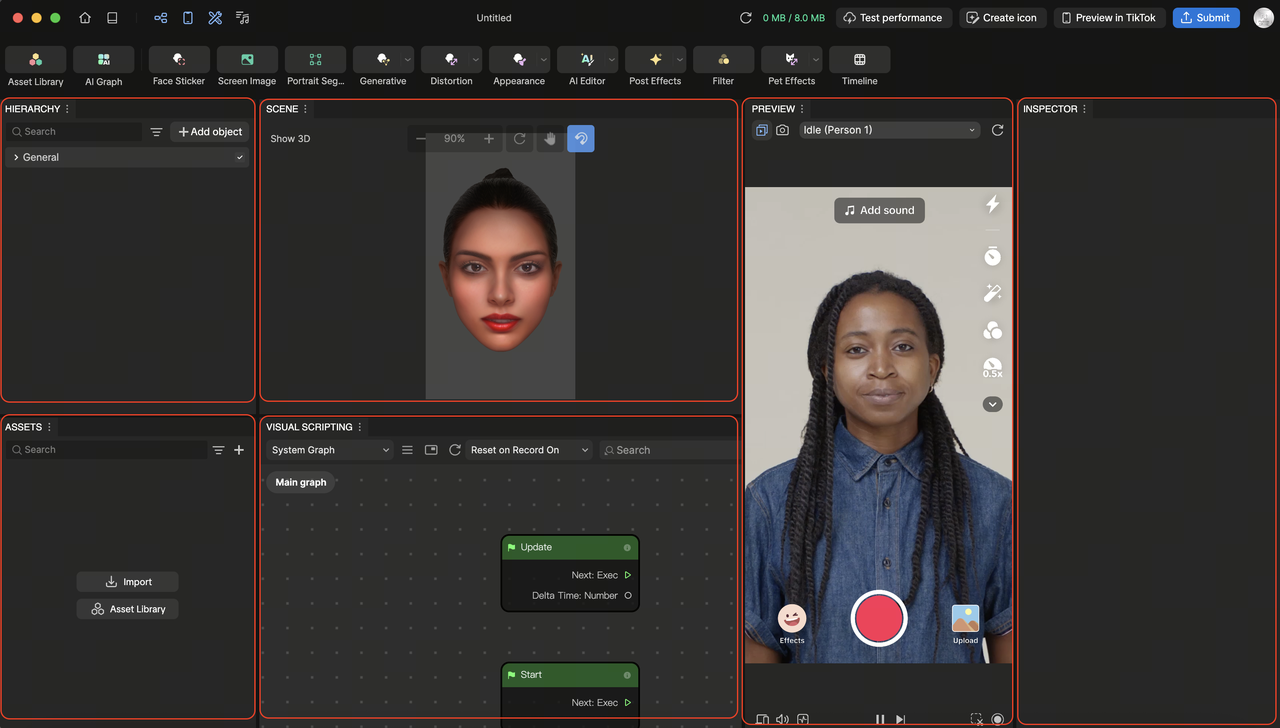
Titlebar
At the top of the workspace is the Titlebar, where you can quickly access key tools and actions while building your effect.
Unlike Lens Studio, which uses its toolbar mainly for layout and window controls, the Effect House Titlebar focuses on quick access to core creation and publishing features.
From the Titlebar, you can:
- Open the Asset Library to browse and add assets
- Show or hide panels like Visual Scripting and TikTok Sounds
- Preview your effect by generating a QR code
- Submit your effect for publishing
Using the Titlebar helps you move quickly between building, testing, and publishing your effect.

Learn more about the Titlebar.
Hierarchy (Scene Hierarchy)
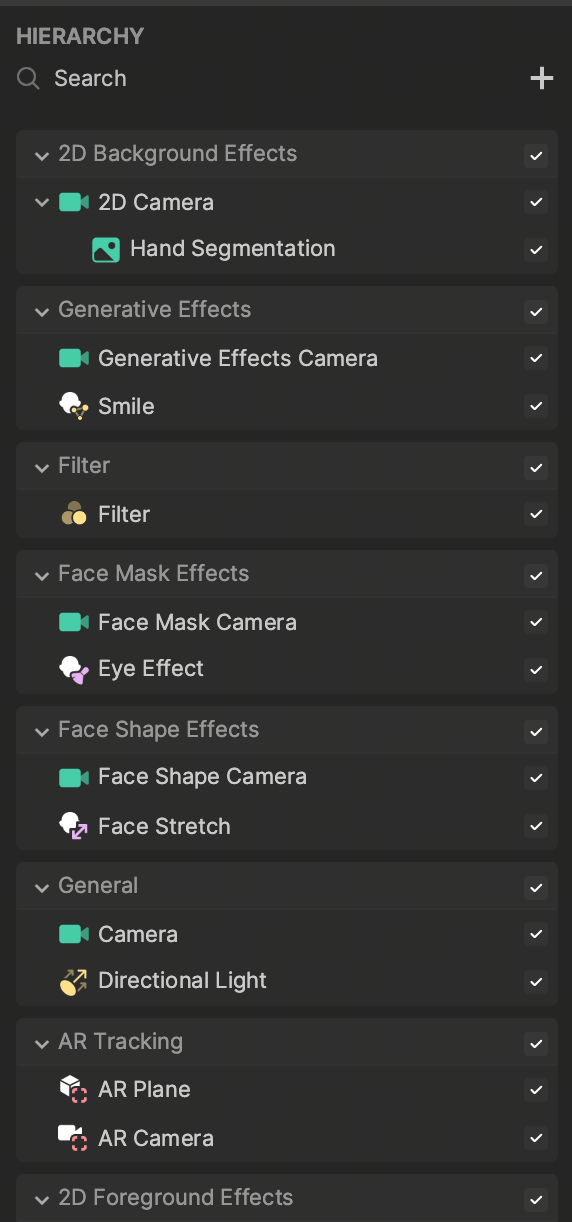
The Hierarchy panel displays all objects in your scene.
- Objects render and execute from top to bottom
- Click + Add object to create new objects
- Drag assets into the scene from the Assets panel
- Toggle object visibility directly in the panel
In both platforms, the Hierarchy controls scene structure. In Effect House, objects also rely heavily on attached components to define behavior.
Render Groups (Effect House Unique Design)
In Effect House, the Hierarchy panel utilizes a unique system called Render Groups. A render group is a container that automatically groups related objects together (such as Face Mask Effects, 2D Foreground Effects, or General) to optimize performance.
- Rendering Order: The placement of render groups in the Hierarchy panel dictates the visual stacking of your scene. The render group at the top renders first, while the render group at the bottom renders last. You can drag and drop entire groups to quickly change what renders in front of or behind other elements.
- Group Cameras: Each render group has a default camera that is specifically responsible for rendering the objects belonging to that group.
Learn more about the Hierarchy panel.
Inspector
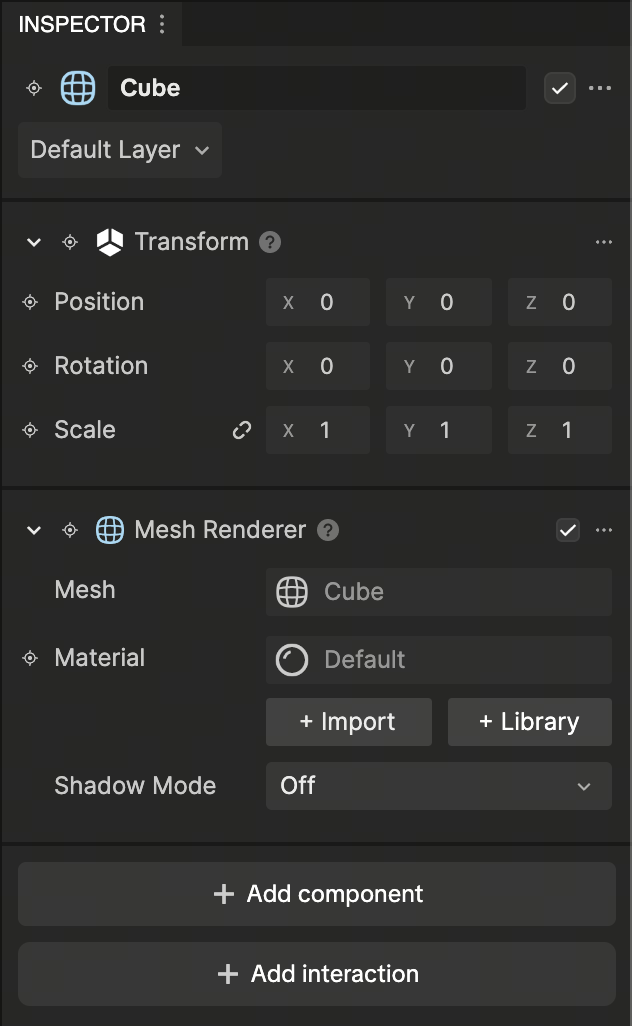
When you select an object or asset, its properties appear in the Inspector.
In Lens Studio, behavior is often defined using script components. In Effect House, functionality is added using Components.
For example:
- Add an Audio Player to play sound
- Add an Interaction component for user input
- Add a Rigid Body for physics
This component-based approach reduces the need for custom scripting and allows you to build interactions more quickly.
Learn more about the Inspector panel.
Assets (Asset Browser)
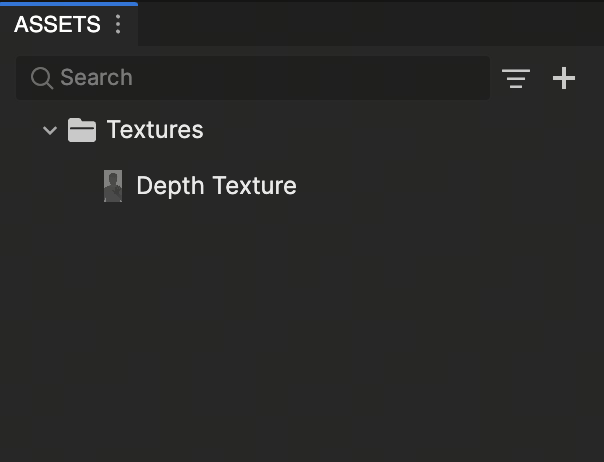
The Assets panel stores all files in your project.
You can:
- Organize files into folders
- Import custom assets
- Add built-in assets using the add button
In Lens Studio, some resources such as camera textures are stored in the Asset panel. In Effect House, these are accessed directly through scene objects or materials instead of being stored as standalone assets.
Learn more about the Assets panel.
Scene & 2D Workspace
The Scene panel is your main workspace.
You can:
- Move, rotate, and scale objects
- Pan and orbit the camera
Effect House integrates a 2D Camera system directly into the scene, allowing you to switch between 3D and screen-based workflows without changing contexts.
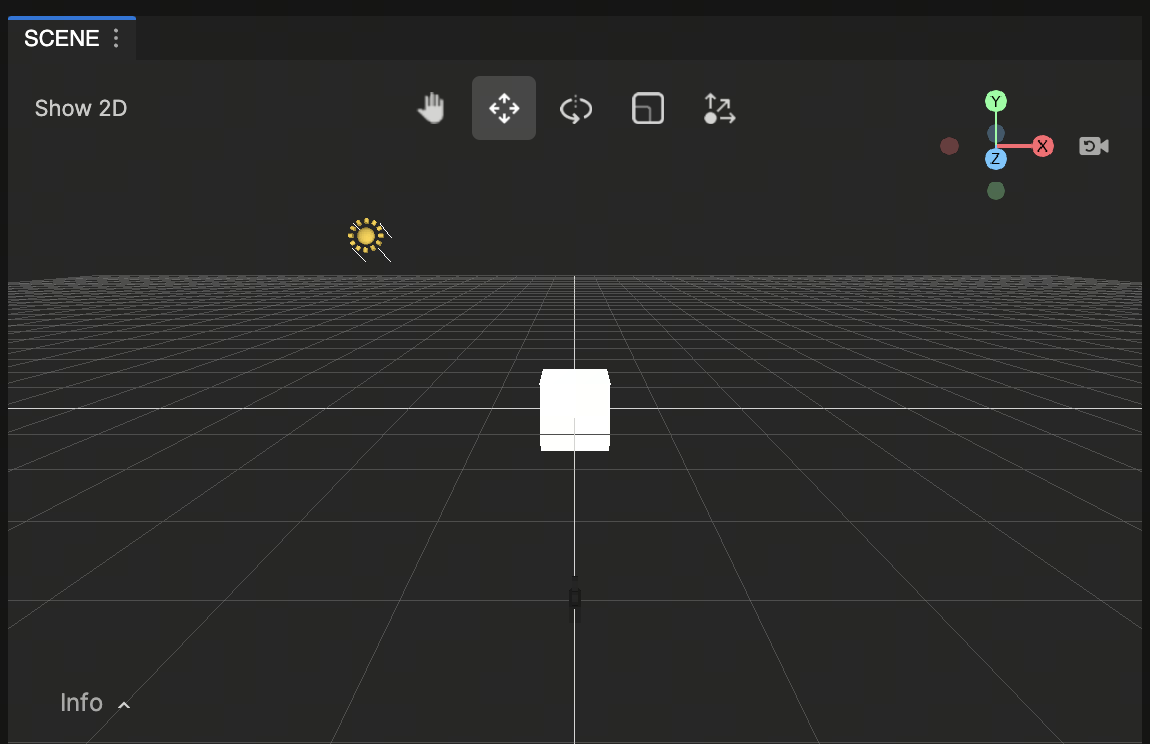
Learn more about the Scene panel.
Preview
The Preview panel shows how your effect looks in real time.
You can:
- Test with built-in videos or images
- Add your own media
- Use your webcam
- Restart your effect at any time
The Preview panel mimics a phone, allowing you to see how your effect will look when used in TikTok. Your effect is applied to a selected preview video.
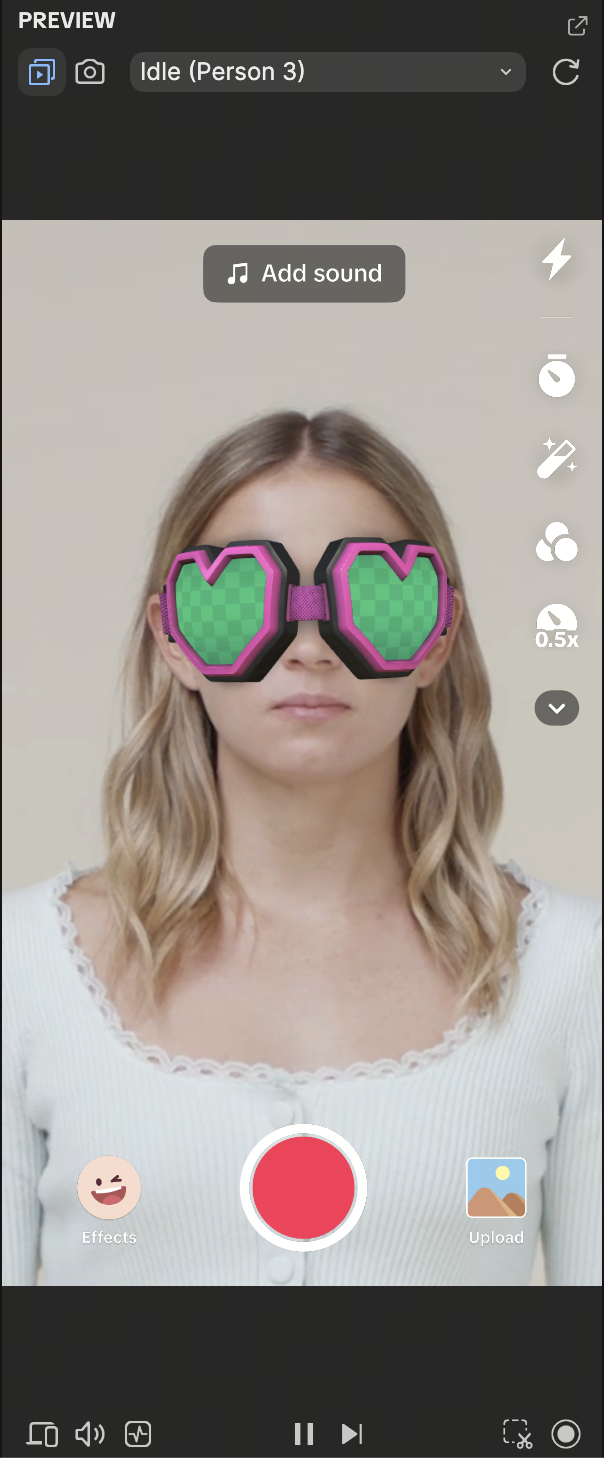
Learn more about the Preview panel.
Console (Logger)
The Console panel displays logs, warnings, and errors while your effect is running.
This works similarly to the Logger in Lens Studio and is primarily used for debugging Visual Scripting logic and runtime behavior.

Learn more about the Console panel.
Key Workflow Differences
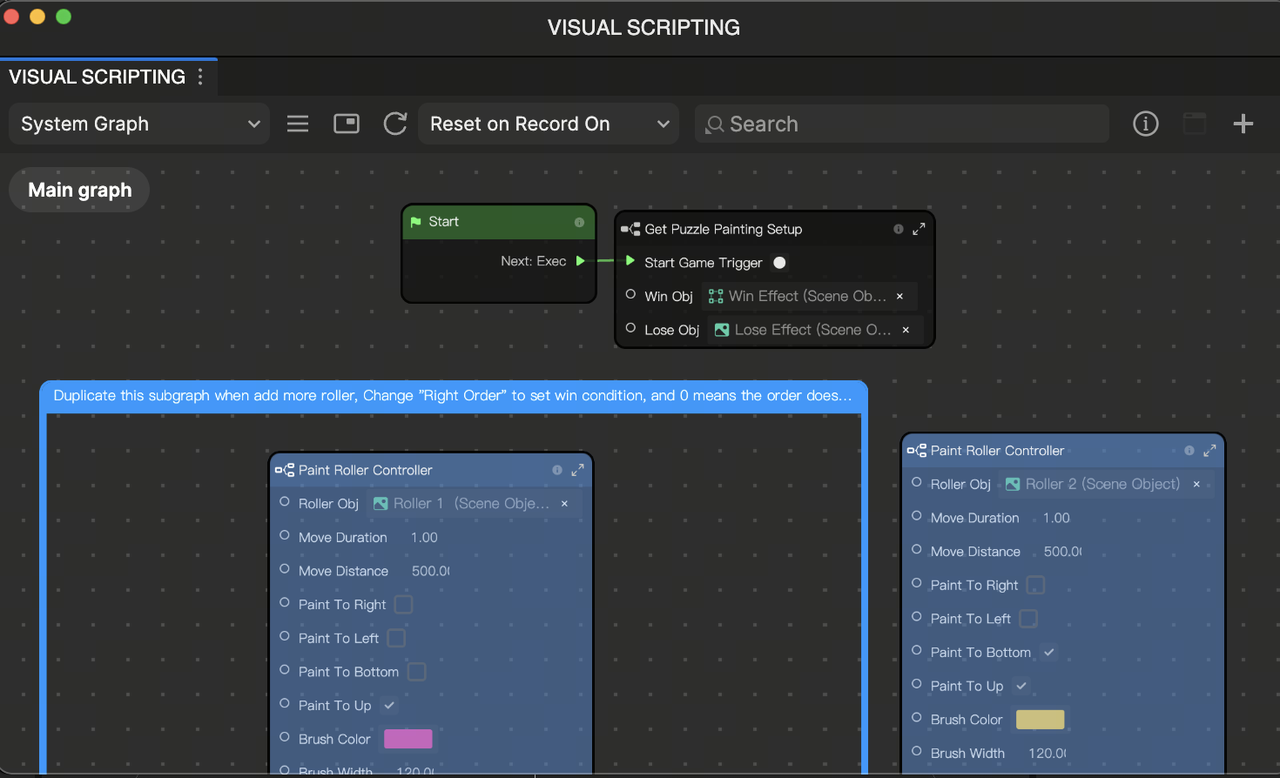
Scripting vs. Visual Scripting
One of the biggest differences between Lens Studio and Effect House is how logic is created. Instead of writing code, you can use Visual Scripting.
- Build logic by connecting nodes from left to right
- Use Start and Update nodes instead of OnAwake or Update
- Create variables directly in the panel and use Get / Set nodes
- Handle interactions using components or nodes like Screen Tap
You can now build logic visually without having to write code.
Learn more about Visual Scripting.
Materials and Shaders
Lens Studio uses the Shader Graph, while Effect House uses the Material Editor.
- Open materials by double-clicking them
- Use nodes to control appearance and behavior
- Adjust parameters directly in the Inspector
In Effect House, material setup is more tightly integrated with the editor and often requires fewer steps to expose parameters.
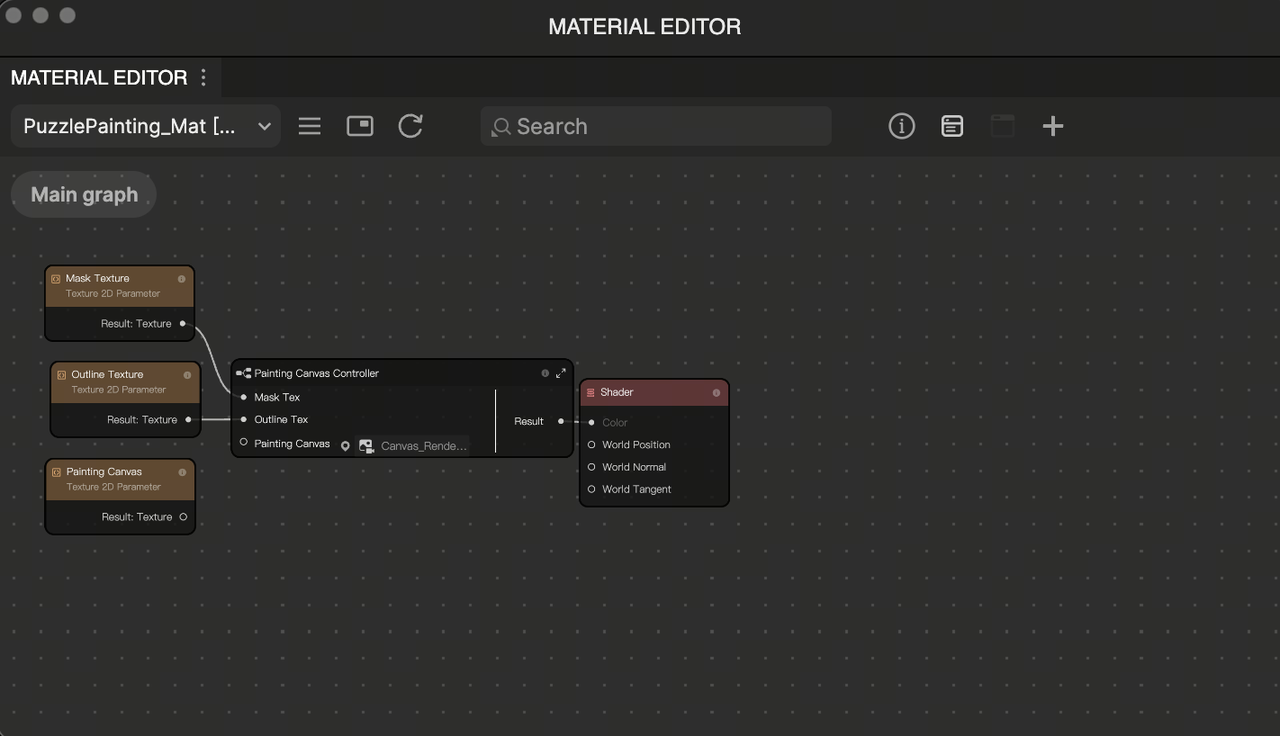
Learn more about Material editor.
Particles and VFX
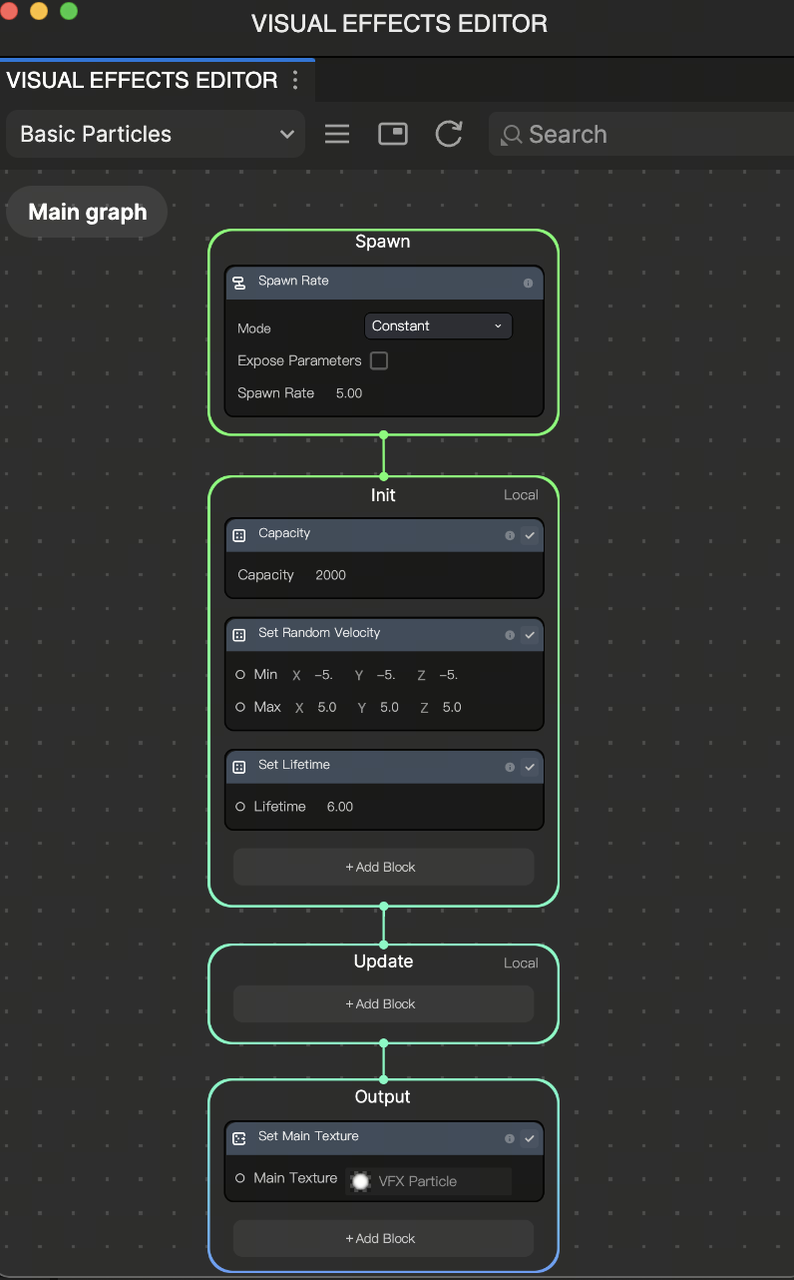
Instead of Lens Studio's VFX Graph and GPU Particles, Effect House uses Basic Particles. When you add a particle system, you can edit it in the Visual Effects Editor panel, which is clearly broken down into 3 lifecycle stages:
- Spawn: Initial properties when the particle is born
- Update: Logic processed every frame during the particle's life
- Output: The material and rendering settings
This structure separates initialization, behavior, and rendering into clearly defined stages.
Physics
Lens Studio requires a configured physics world. Effect House includes a built-in physics system.
- Add Rigid Body and Collider components directly to objects
- No additional setup is required for basic physics behavior
- Supports joints and cloth simulation
This allows you to apply physics more quickly without additional configuration.
Learn more about Visual Effects editor.
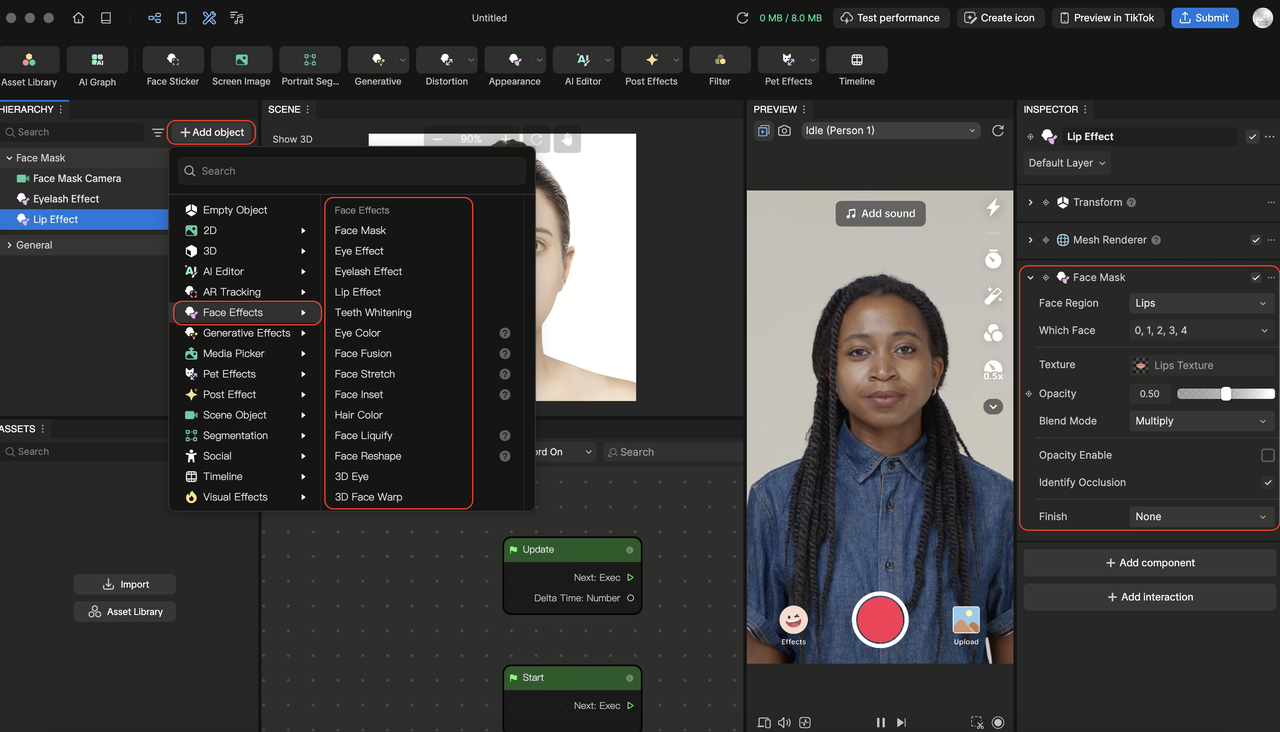
Built-in Makeup and Post Effects
In Lens Studio, features like makeup effects often require importing helper assets. In Effect House, many of these are built in.
- Add makeup objects such as lips or eyeshadow directly from the Hierarchy
- Add post effects such as color filters directly from the Hierarchy and adjust them in the Inspector
This reduces setup time and simplifies common workflows.
Learn more about the Face Mask object.
Audio and Microphone
Lens Studio uses Audio objects with licensed sound assets. Effect House integrates with TikTok's sound ecosystem.
- Use the Audio Player component to play sound
- Access TikTok's sound library
- Use the Microphone node directly in Visual Scripting
Effect House simplifies audio input and playback by integrating it directly into components and nodes.


Learn more about TikTok Sounds.
Generative AI and Machine Learning
Both platforms offer plenty of generative AI capabilities, but they are accessed differently.
Lens Studio: Uses the GenAI Suite and an AI Assistant chat window to generate assets, textures, or entire projects based on prompts.
Effect House (AI Editor): A dedicated panel accessed from the Tool Bar where you can generate AI Image and AI Video models. By combining a base model (like Image Alive or Lip Sync) with text prompts and reference images, you can create custom AI Textures or animated styles. Learn more about AI Editor.
Effect House (AI Graph Editor): A node-based editor (similar to Visual Scripting) specifically for AI. It allows you to chain multiple AI base models together—connecting Image-to-Image (I2I) and Image-to-Video (I2V) nodes—to produce complex, multi-step AI transformations. Learn more about AI Graph Editor.
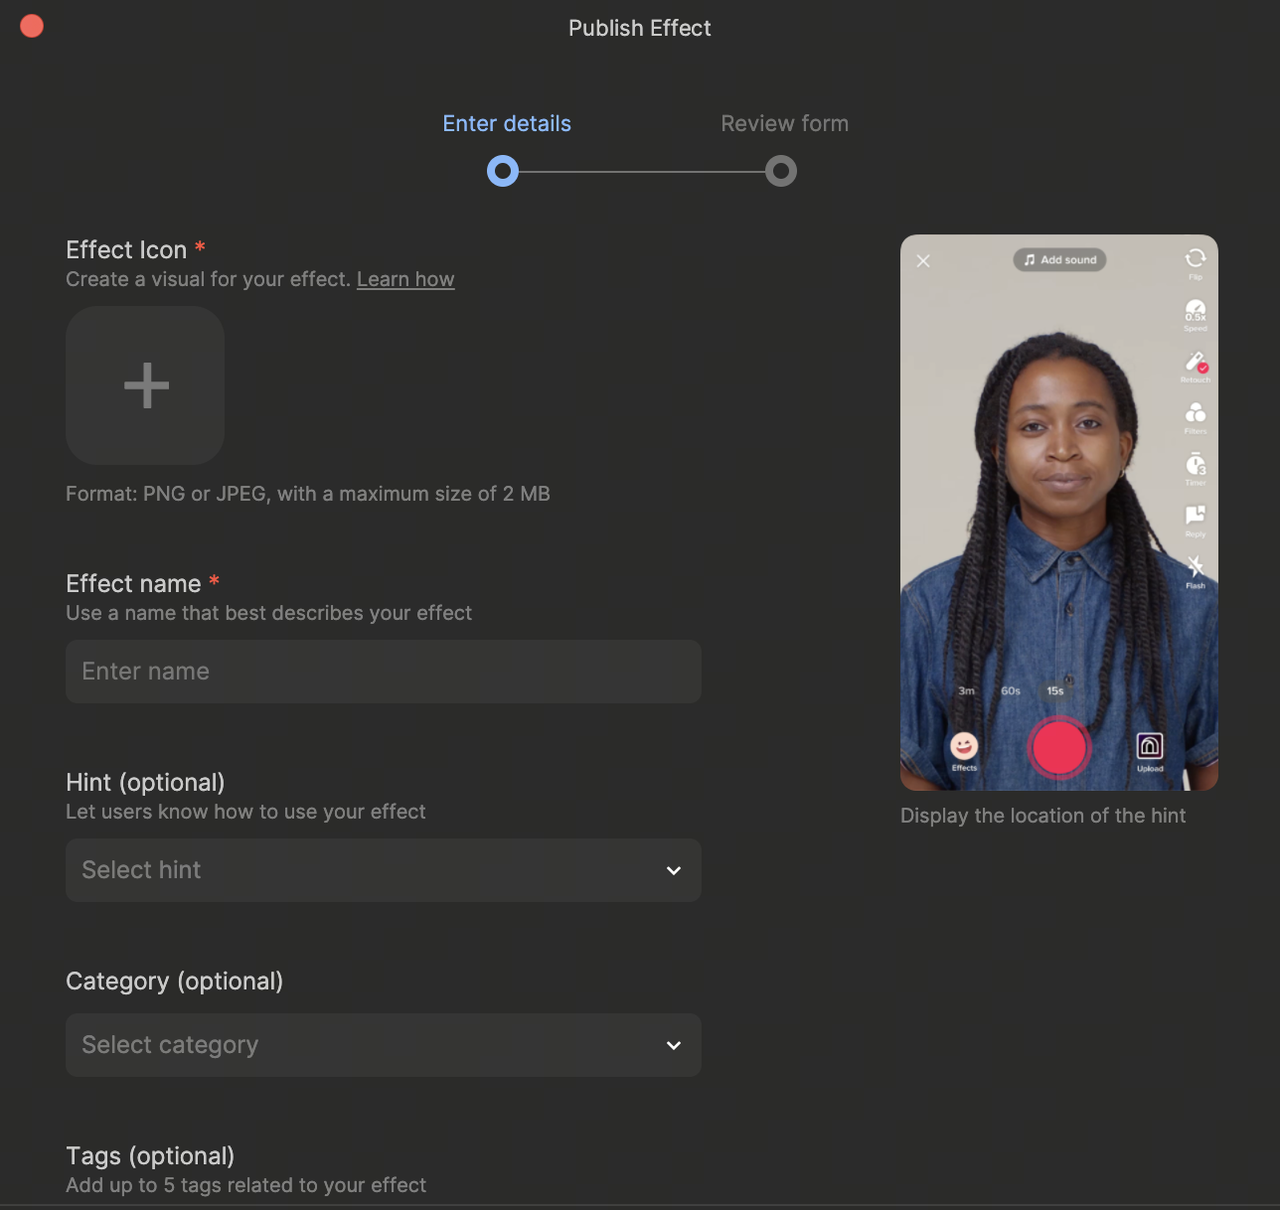
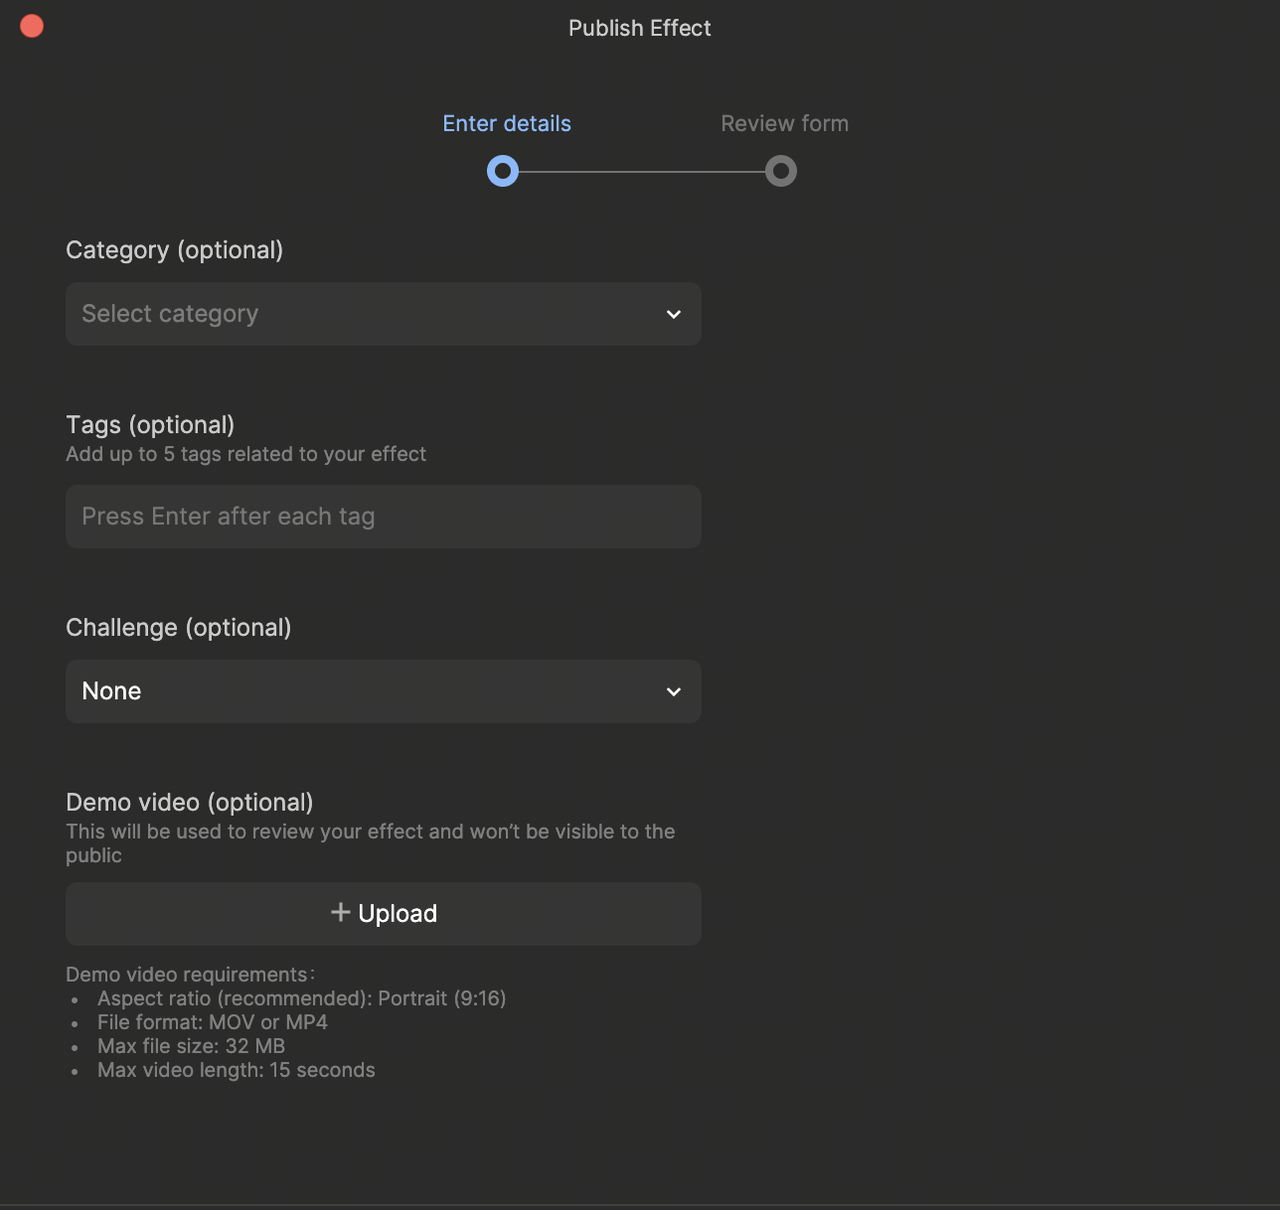
Publishing Your Effect
When your effect is ready:
- Click Submit in the toolbar
- Complete the publishing flow
- Track performance and analytics in the Effect House portal
In Lens Studio, effects are published to Snapchat. In Effect House, effects are distributed on TikTok.
Learn more about how to Submit Your Effect.
Get Started
Now that you're familiar with the core differences between Lens Studio and Effect House, you can start building your first project!
To continue learning:
- Open a Template to explore how effects are structured and built
- Try the AI Editor to quickly generate and iterate on creative ideas
- Create a simple effect using Visual Scripting
- Add an Interaction to make your effect interactive
By understanding how features map between platforms, you can quickly transition your Lens Studio experience into Effect House.