Fox Face Morph
The Fox Face Morph effect allows you to transform your face into a fantasy fox by simply opening your mouth. Explore this fun and creative feature, and customize it by creating your own 3D Face Morph effect with a 3D Mesh!

Open the Template
To use this template in your Effect House project:
- Go to Templates
- Click the Interactive tab
- Select the 3D Face Morph template

Heirarchy
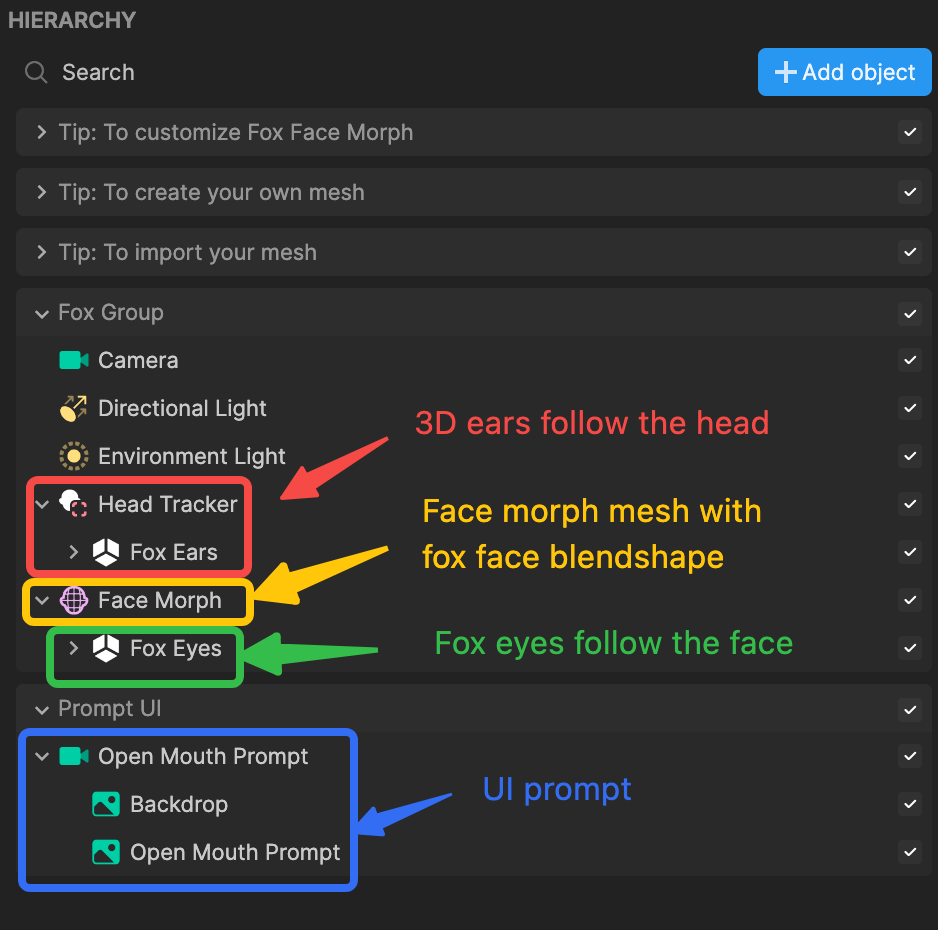
In the Hierarchy panel, there are several render groups:
- Tip: To customize Fox Face Morph contains helpful hints to customize the Fox Face Morph within the Visual scripting panel
- Tip: To create your own mesh contains helpful hints to create your own mesh
- Tip: To import your mesh contains helpful hints to import your mesh
- Fox Group renders the Head Tracker that contains the 3D ears that follow your head, Face Morph mesh with a Fox Face blendshape, and the Fox Eyes
- Prompt UI renders the initial open mouth prompt and accompanying backdrop
Create your own 3D Face Morph mesh
Before you get started, you'll want to create a mesh that has a blendshape on it. You can also download our 3D Face asset and take it into your favorite 3D editing software and create your own blendshape.
Import your Mesh
To customize this template with your own mesh and blendshape, you can import your own and associate it with a 3D Face object.
To import your Mesh:
- Go to the Assets panel and click the Add asset button [+]

- Go to Import and click 3D Face Binding Mesh
- Select your FBX file or your preferred file type and click Open. Your mesh is now added to the Assets panel.
The next step is to add a 3D Face object to your effect:
- Go to the Hierarchy panel
- Click + Add object
- Go to Face Effects and click 3D Face. A 3D Face object is now added to the Hierarchy panel. Now we'll want to swap out the mesh within the 3D Face object with your own mesh we imported earlier on.
- Go to the Hierarchy panel
- Click 3D Face
- Go to the Inspector panel and locate the Mesh Renderer
- Click the Mesh field
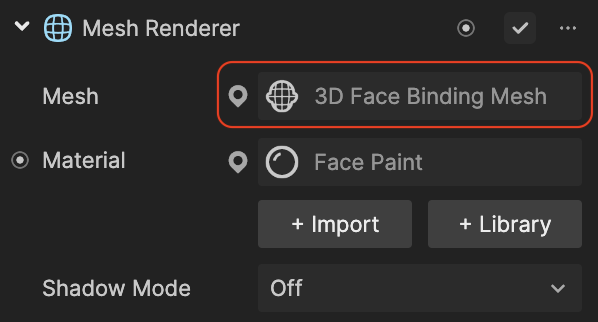
- Select the mesh that you imported from the list and click OK. Your mesh is now associated with the 3D Face object. (Don't forget your mesh should also include a blendshape!)
To adjust the strength of your blendshape, you can adjust the Deformation setting. In the Hierarchy panel, go to 3D Face and in the Inspector panel, go to Deformation and locate your blendshape and adjust it as you'd like.
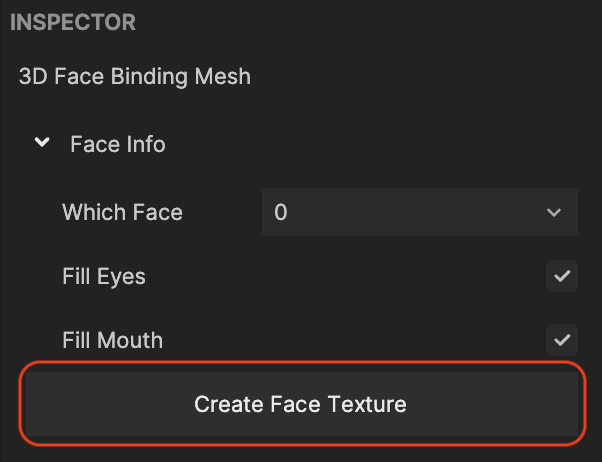
Next, we'll go into the 3D Face Binding Mesh and create a texture within the Inspector panel.
- Go to the Assets panel
- Go to Meshes and click 3D Face Binding Mesh
- Go to the Inspector panel and locate the Face Info component
- Click Create Face Texture. A Face Texture is now added to the Assets panel.
Now let's swap out the default Face Paint texture and update it with the Face Texture that was added earlier into the Assets panel.
- Go to the Assets panel
- Go to Materials and click Face Paint
- Go to the Inspector panel and locate the Base Property component
- Click the Texture field
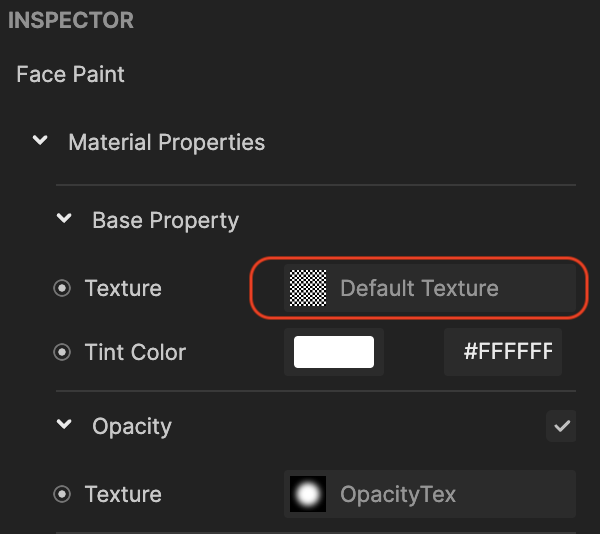
- Select the newly created Face Texture and click OK. You've now successfully created the material that can be used with your mesh!
To continue to adjust the strength of your blendshape, you can adjust the Deformation setting. In the Hierarchy panel, go to 3D Face and in the Inspector panel, go to Deformation and locate your blendshape and adjust it as you'd like.
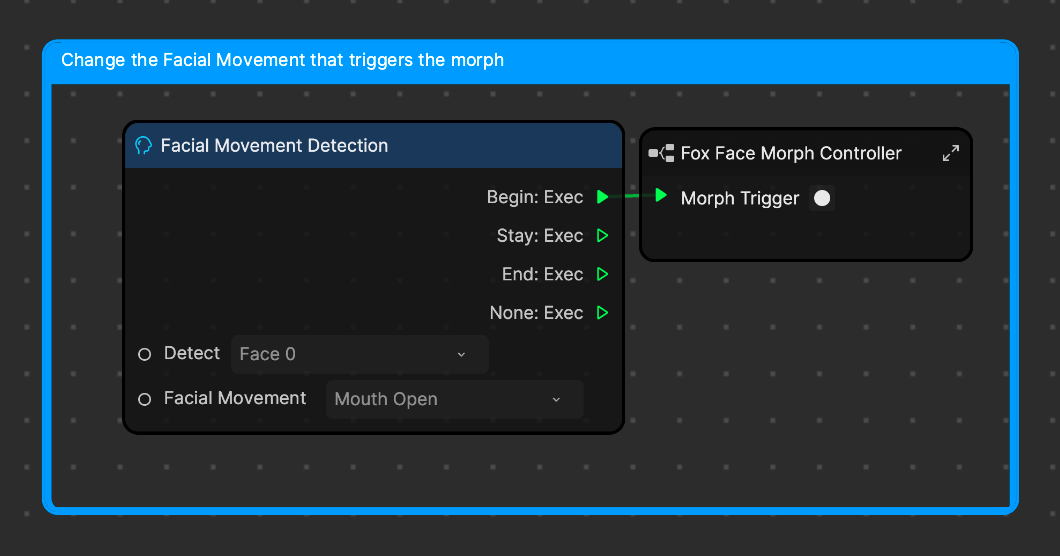
Visual Scripting
You can also dive deeper into customizing the Fox Face Morph within Visual Scripting