Photo Slideshow
Take a walk down memory lane with the Photo Slideshow template! This template allows TikTok users to upload images from their personal galleries (the User Media Texture), crafting a seamless transition through cherished photos!

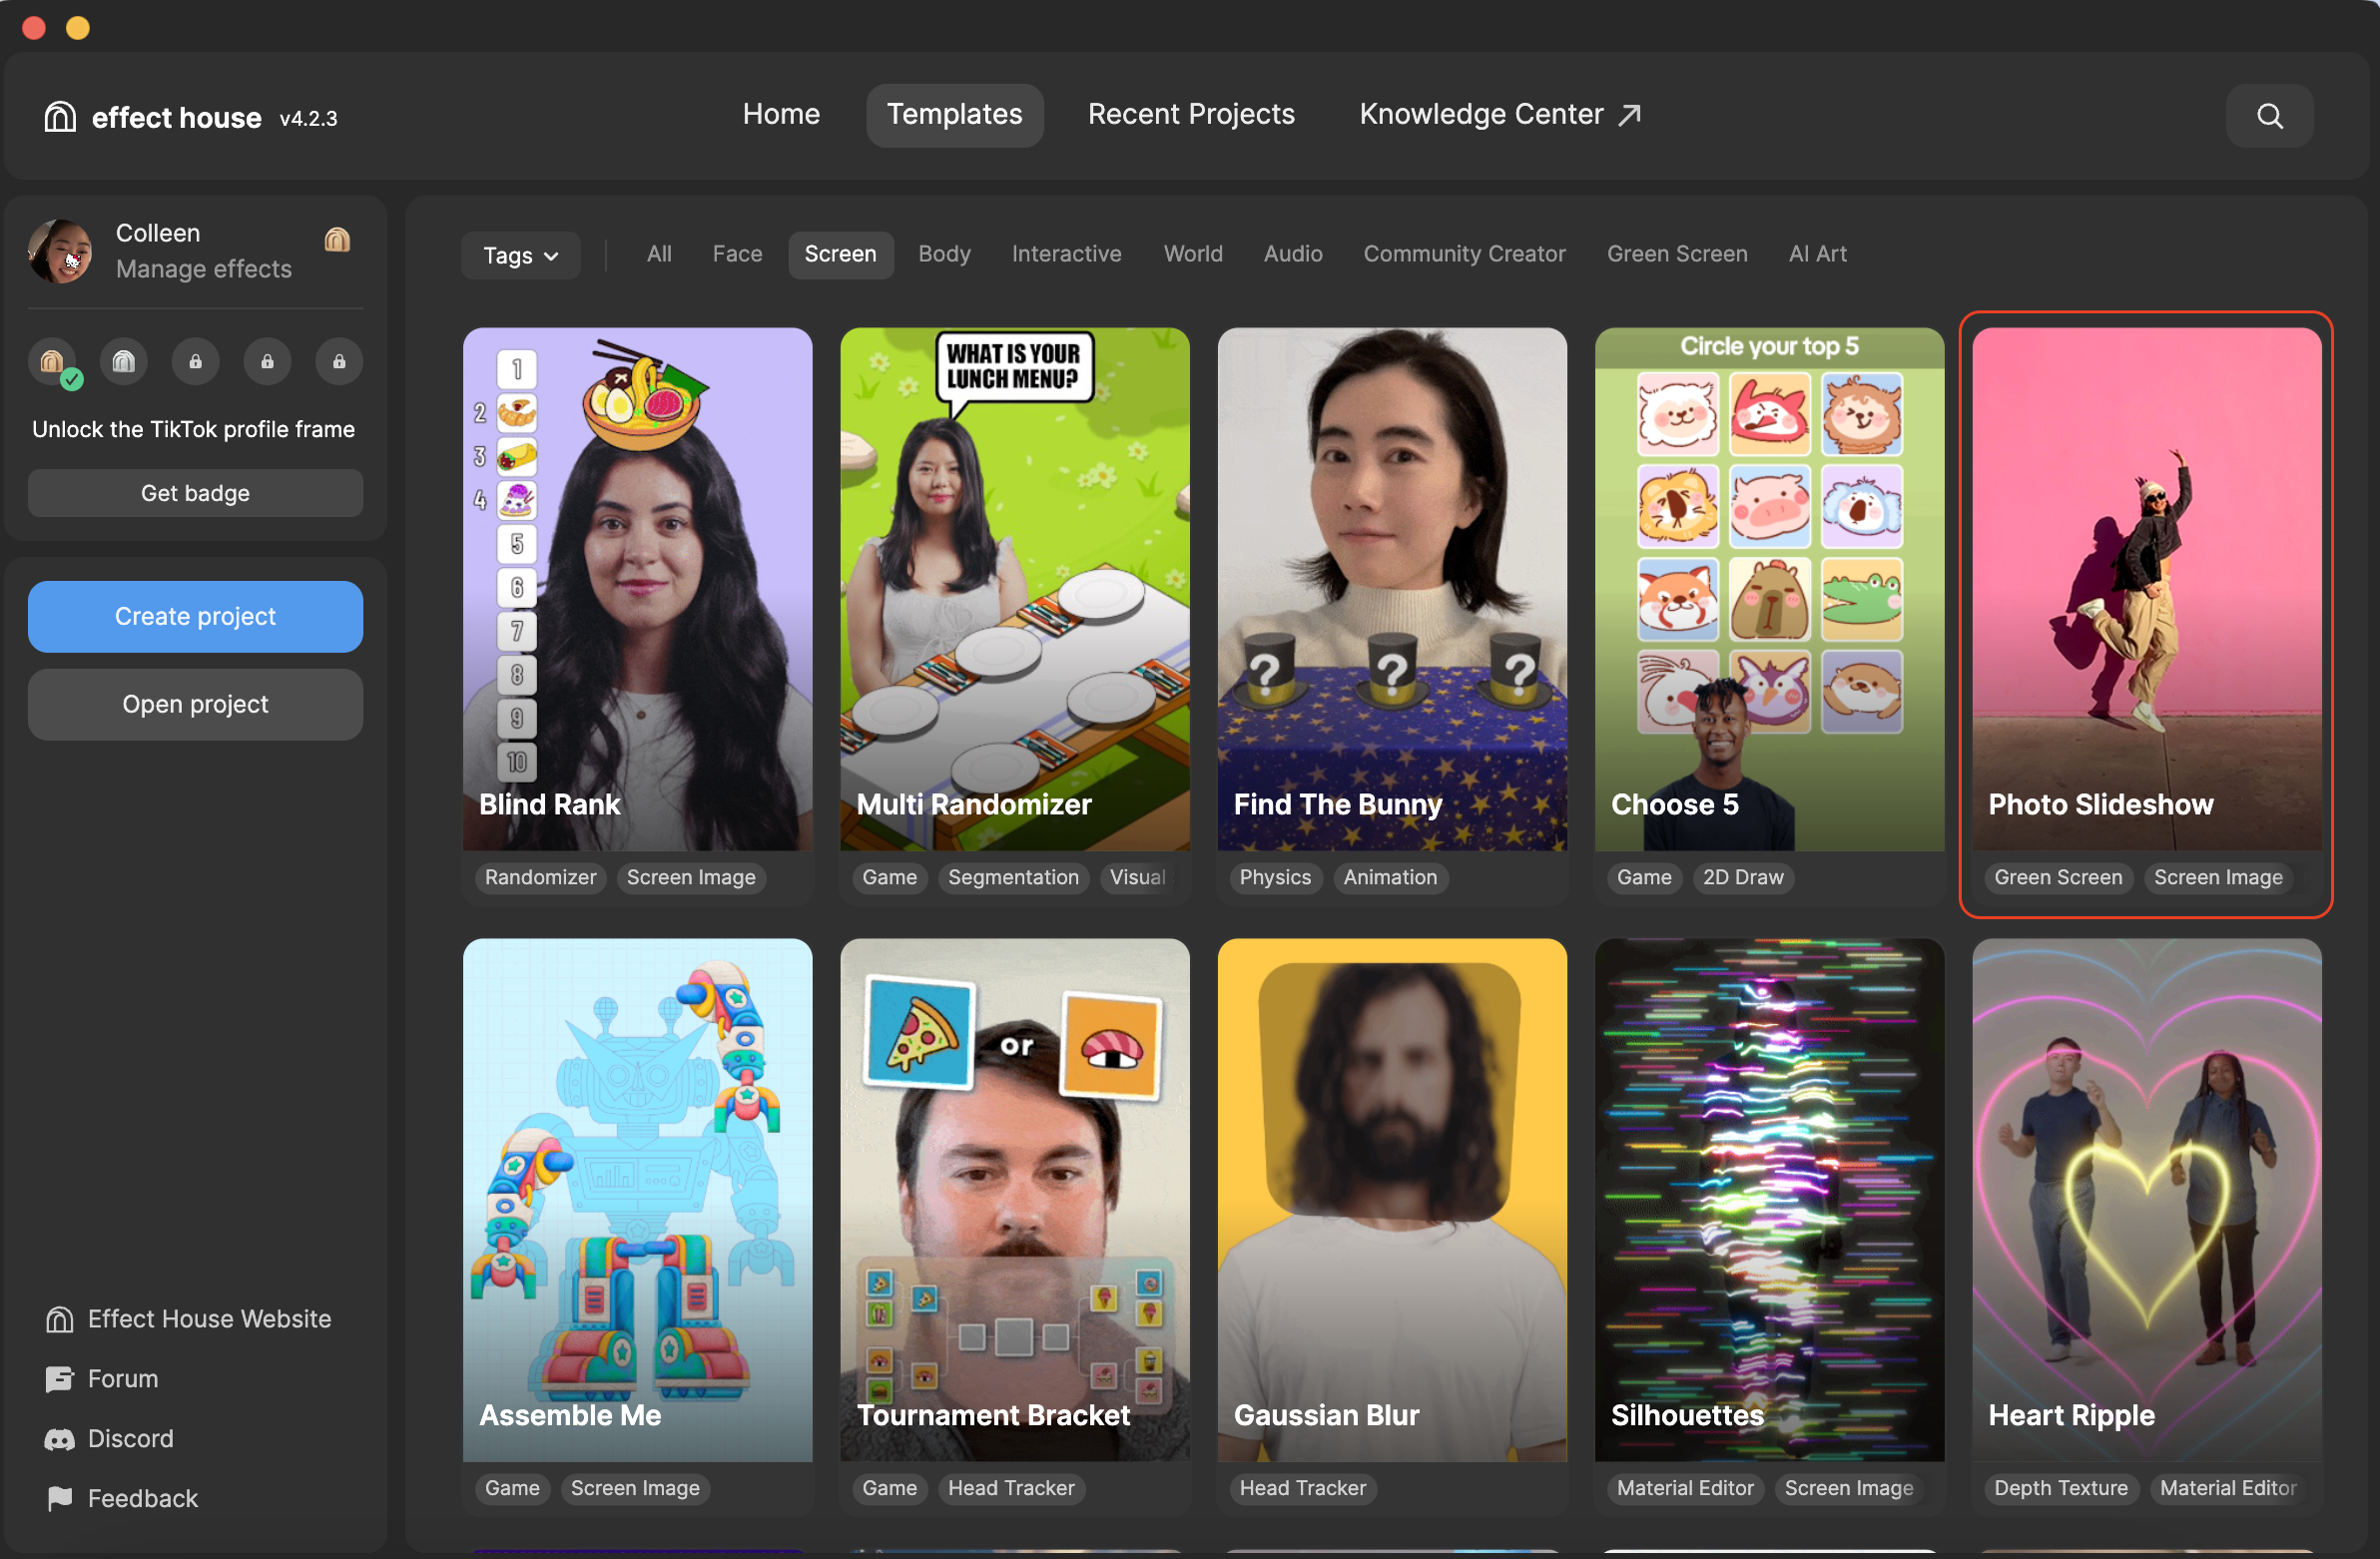
Open the Template
To use this template in your Effect House project:
- Go to Templates
- Click the Screen tag
- Select the Photo Slideshow template
Hierarchy
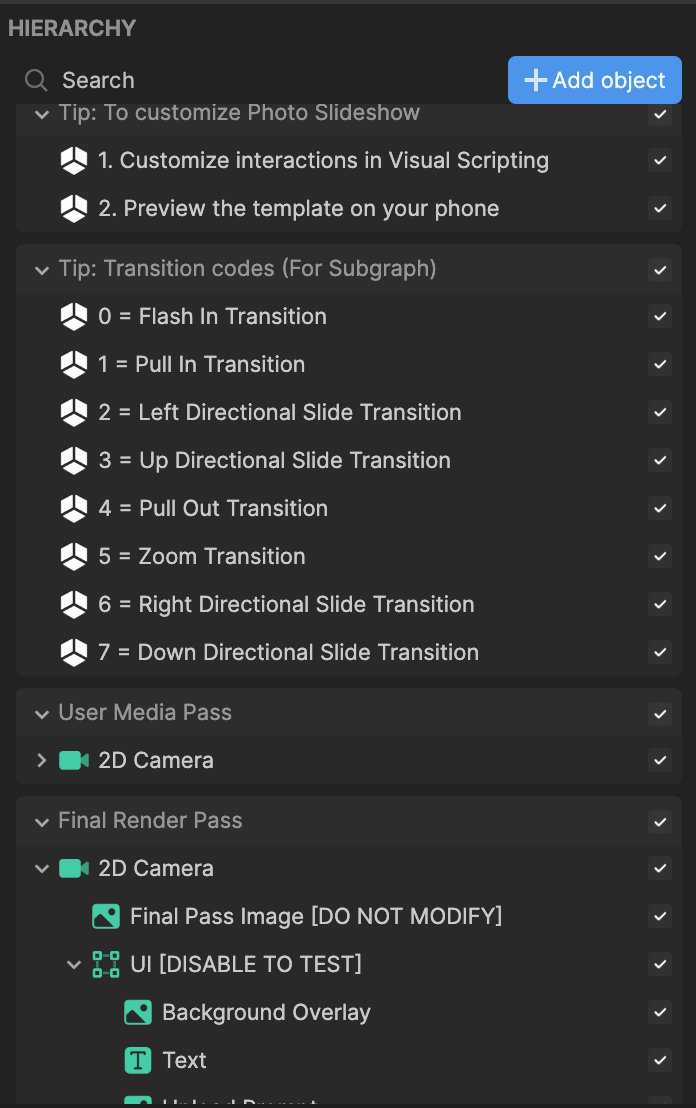
In the Hierarchy panel, there are four main render groups:
- Tip: To customize Photo Slideshow contains helpful hints to customize the photo slideshow
- Tip: Transition codes (For Subgraph) outlines the different transition codes which you will use
- User Media Pass renders and loops through the children images
- Final Render Pass renders the final result and the initial upload screen
User Media
In the Hierarchy panel, the Holders screen transform object holds three user media.

To add an additional user media:
- Click + Add object
- Go to 2D and click Screen Image
- Move Screen Image to the User Media Pass render group as a child of the Holders object
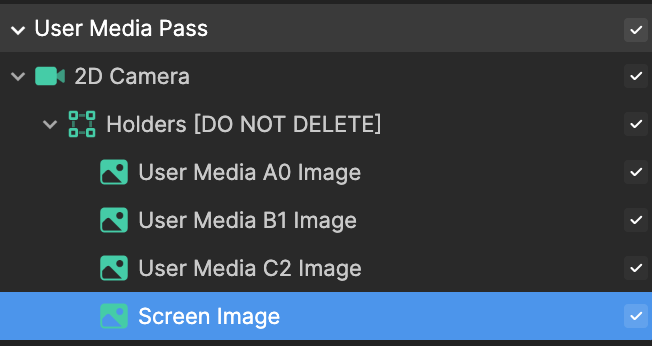
- Rename the Screen Image object by right-clicking it and entering a new name, such as New User Media
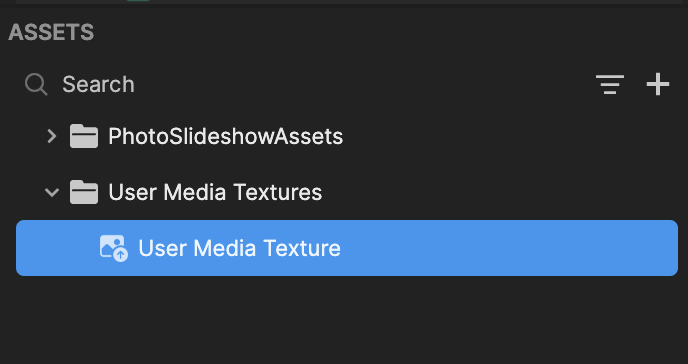
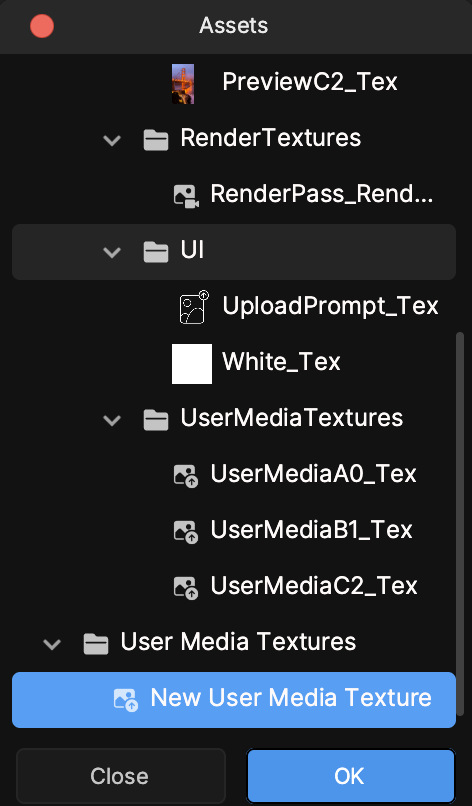
- Go to the Assets panel and click the Add asset button [+]

- Go to Texture and click User Media Texture. The new texture appears in the User Media Textures folder
- Select the newly added Screen Image object in the Hierarchy panel
- Go to the Inspector panel and locate the Image component
- Click the Texture field
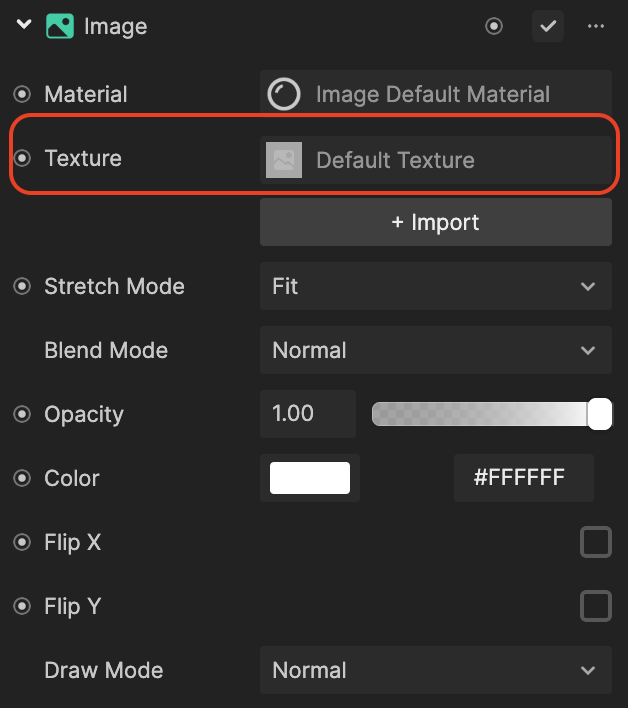
- Select the newly added User Media Texture and click OK
The final step is to configure the "backend" so that the effect knows how many user media to account for!
In the Visual Scripting panel, double-click the Photo Slideshow Controller subgraph. (A large graph appears but don't be alarmed!) 2. Navigate to the Check How Many User Media is Uploaded subgraph at the very left of the visual scripting logic
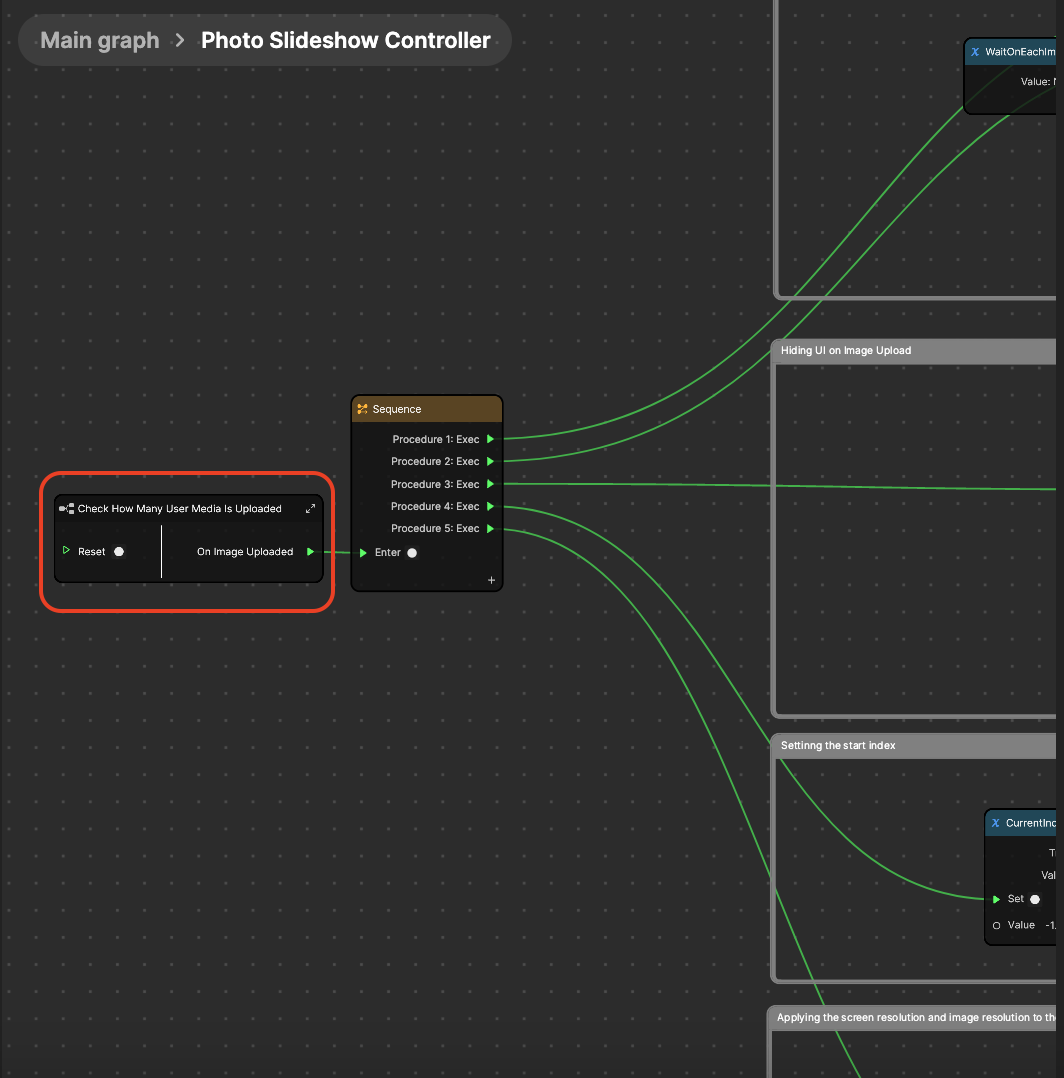
- Double-click the subgraph
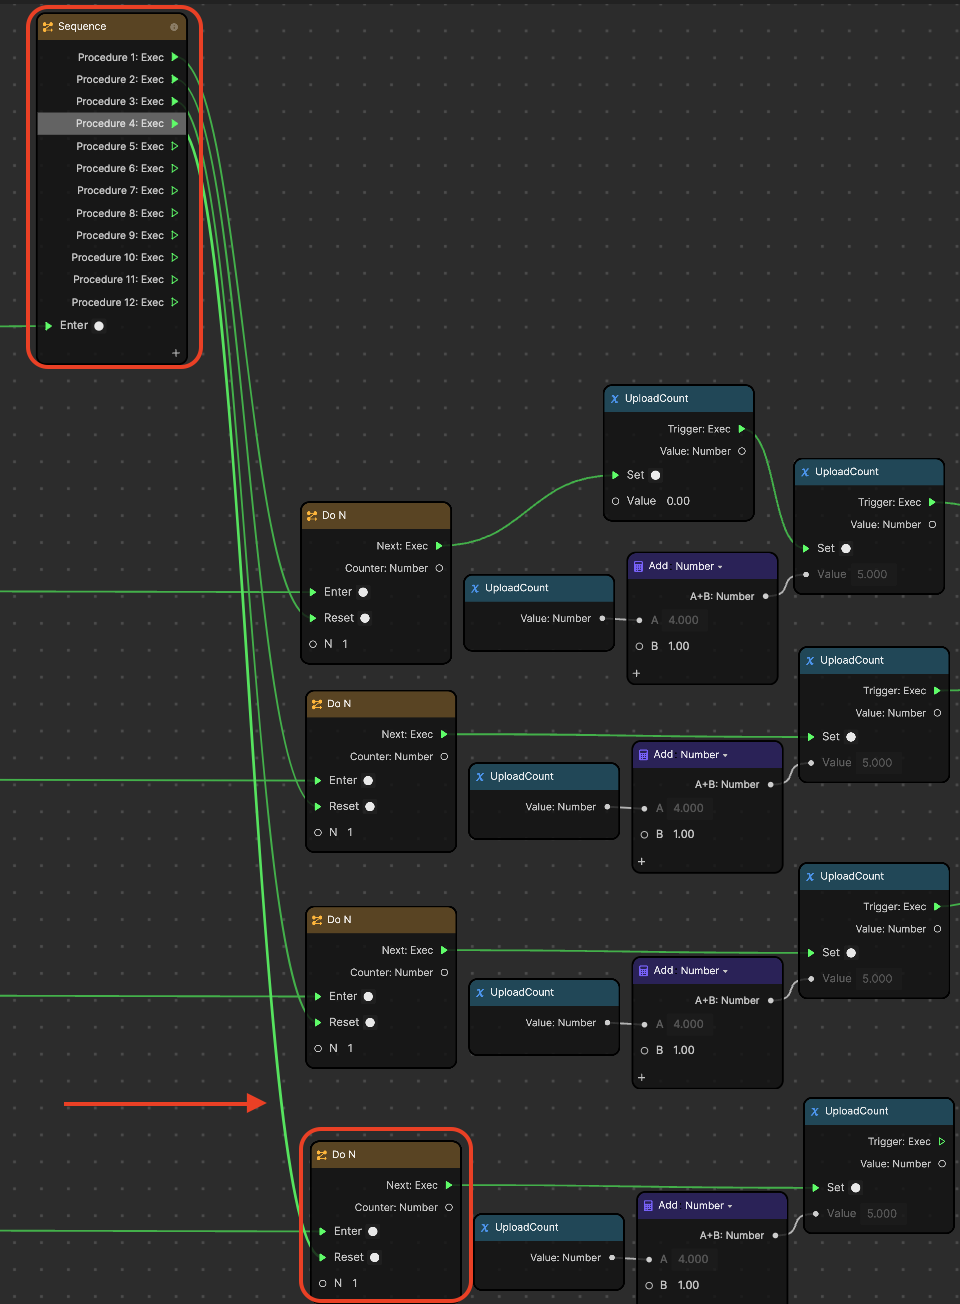
- Select a set of user media logic nodes: User Media Info, If, Do N, Upload Count, Add, and another Upload Count
Drag your cursor across the six nodes horizontally, creating a rectangle over them
- Duplicate the selected node by pressing the Control key + D
- Position the series of duplicated nodes under the original set of nodes
- From the first (left-most) Sequence node, connect Position 4: Exec to the duplicated If node
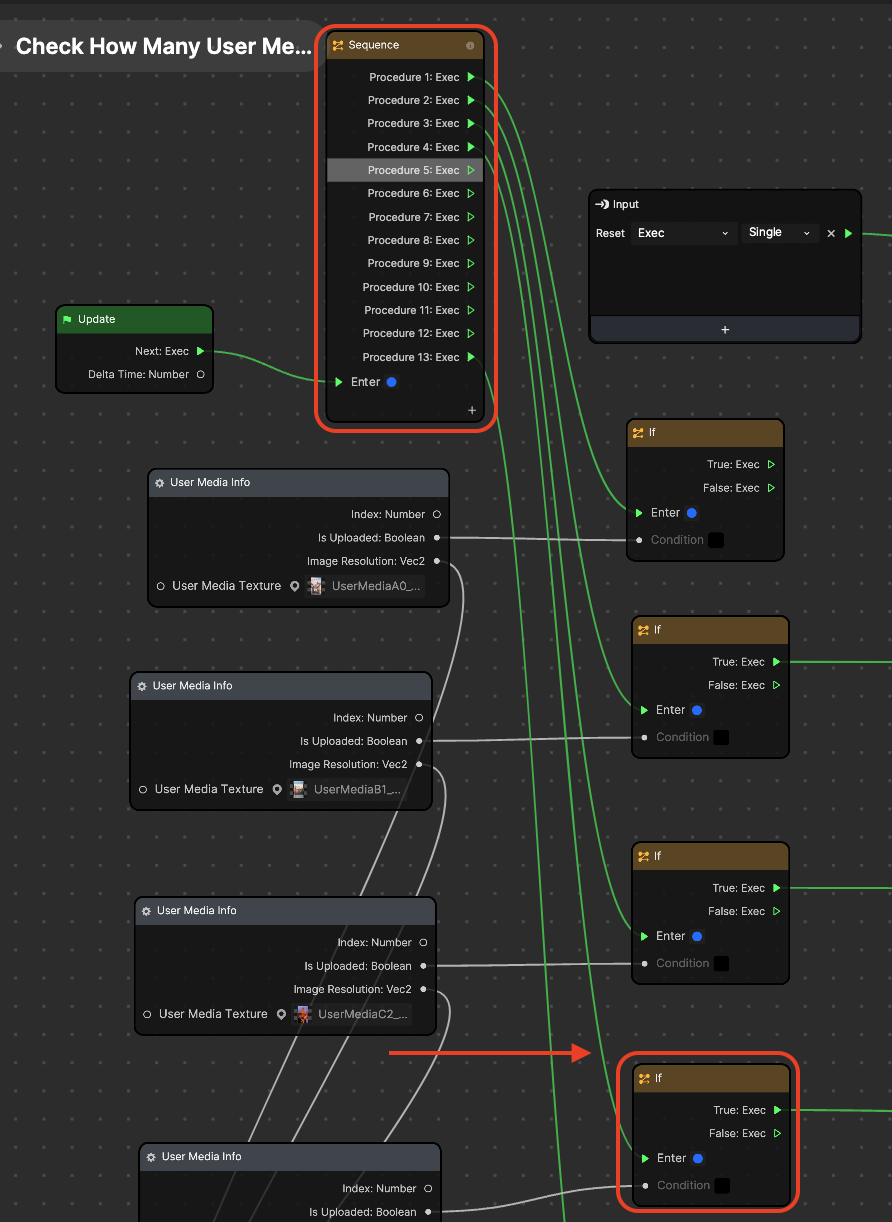
- From the second (right-most) Sequence node, connect Position 4: Exec to the duplicated Do N node
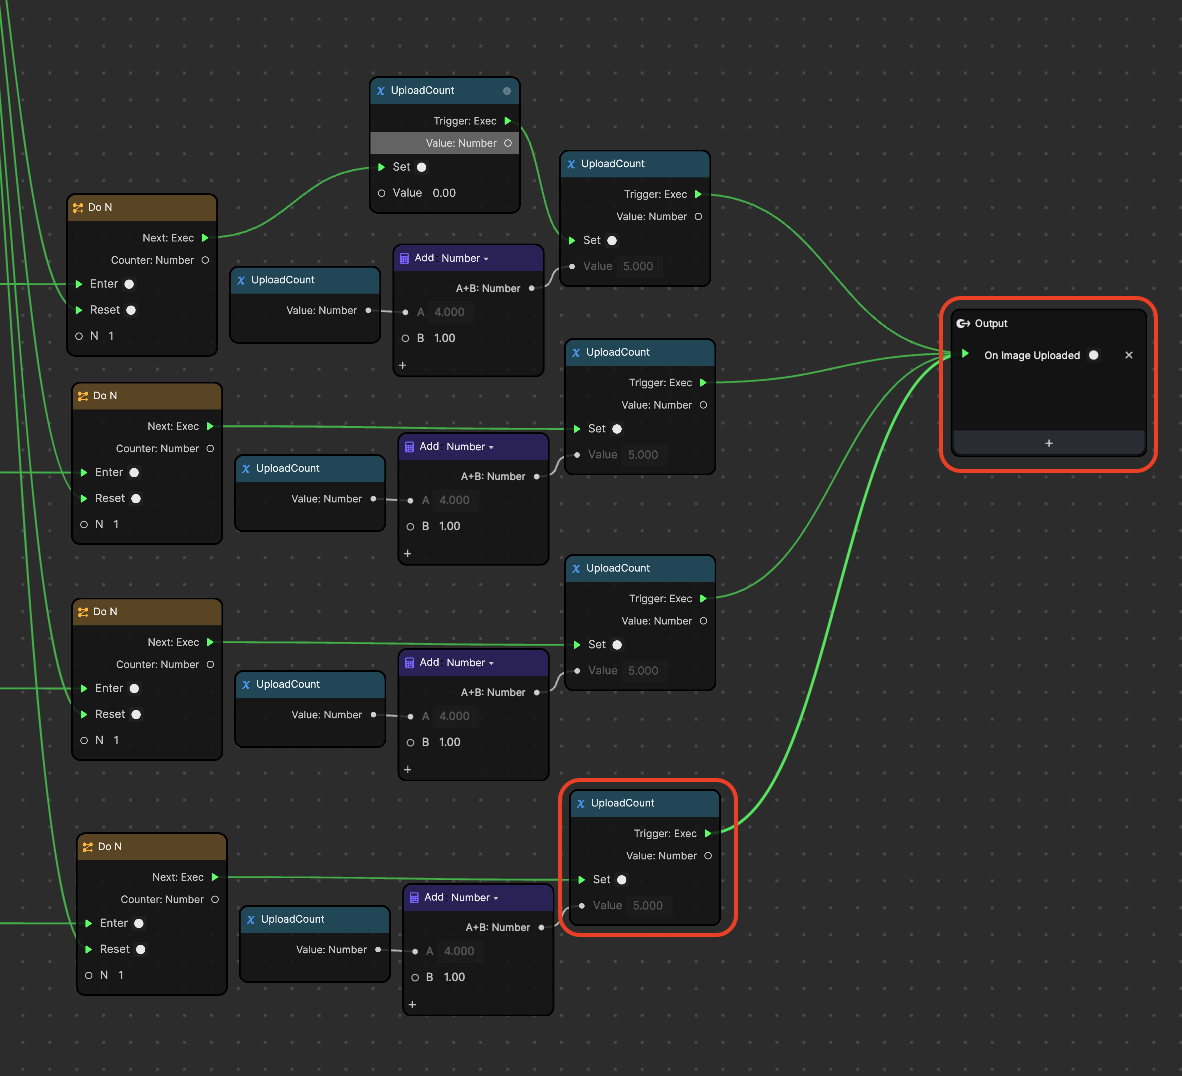
- Connect Triggere: Exec of the duplicated UploadCount node to the Output node
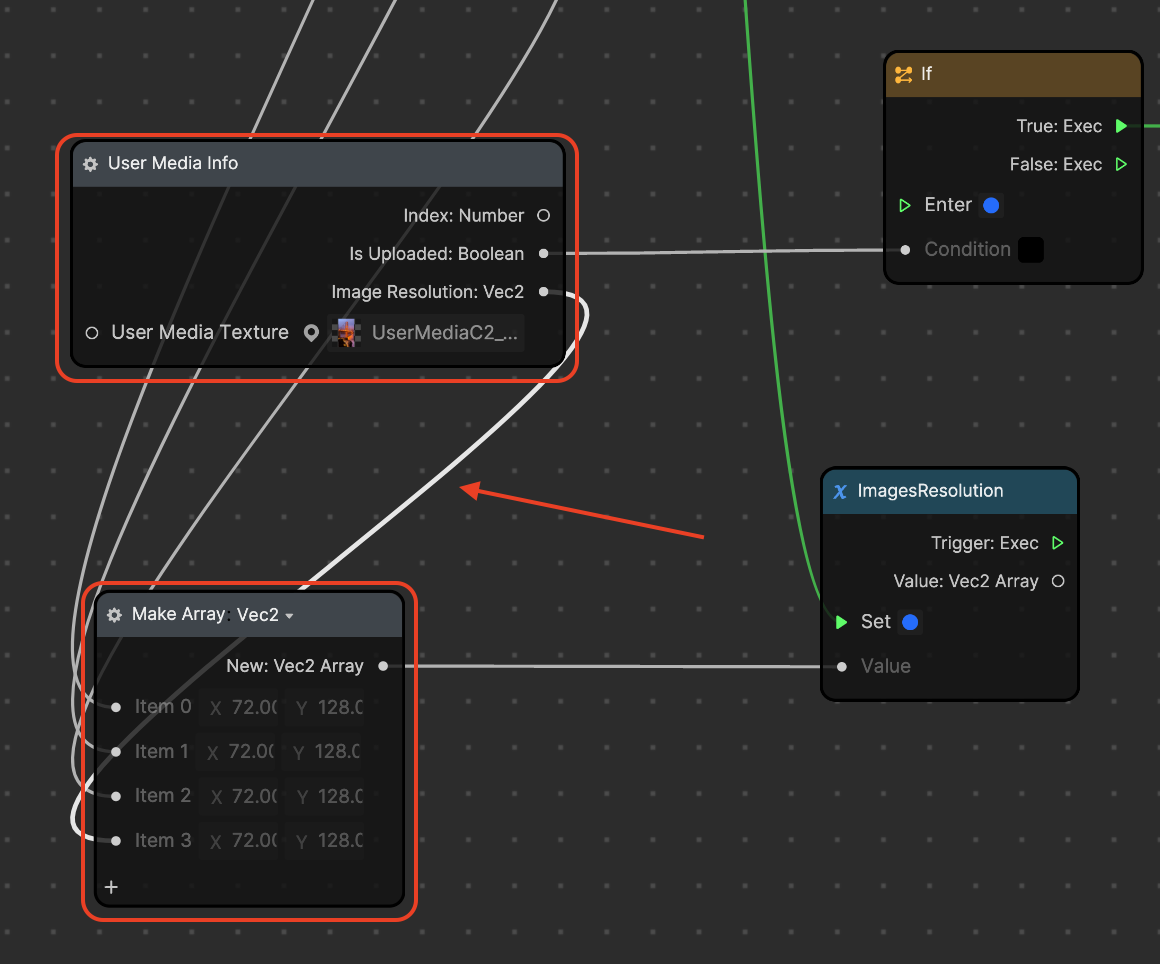
- Click the Add button [+] in the Make Array node
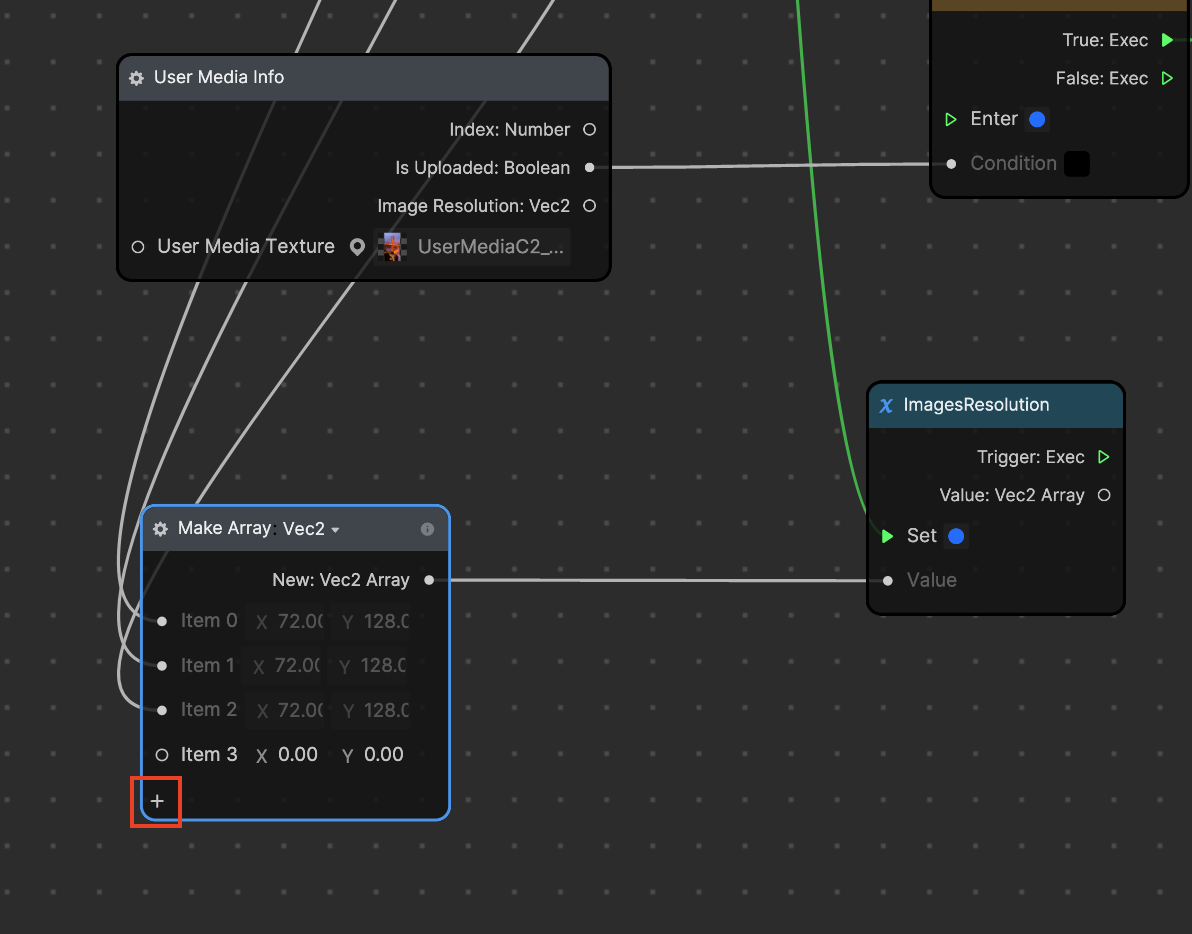
- Connect Image Resolution from the duplicated User Media Info node to Item 3 of the Make Array node
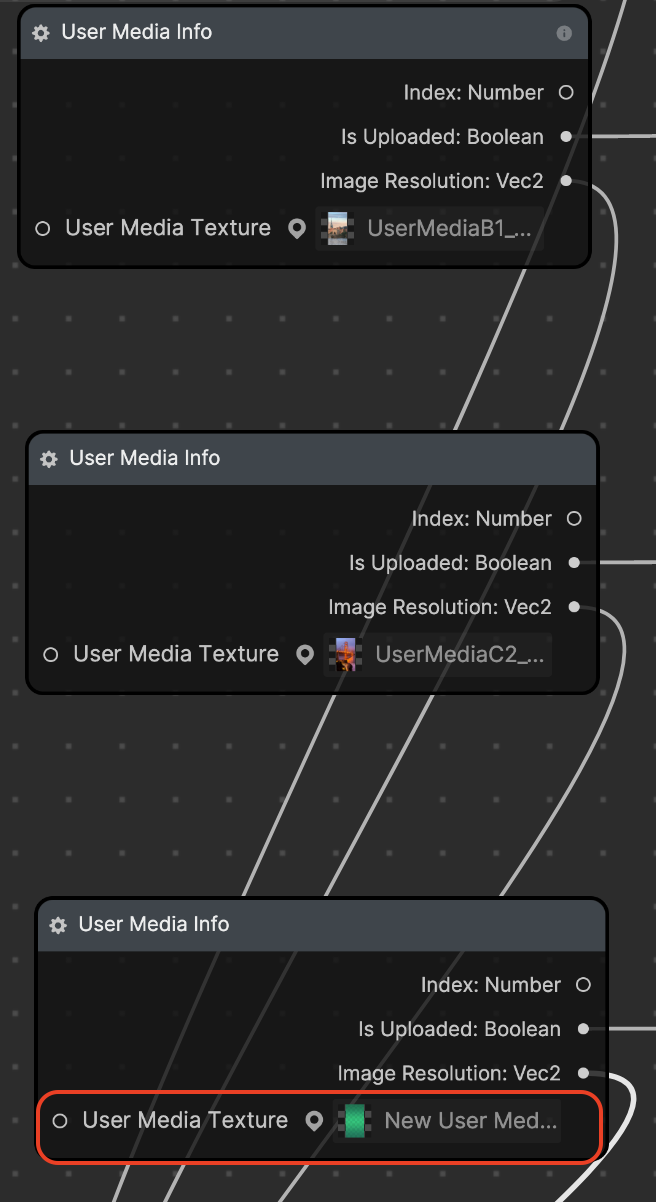
- In the duplicated User Media Info node, click the User Media Texture field
- Select the newly created User Media Texture and click OK
Now the new User Media Texture can be displayed in the slideshow!
Customize the Slideshow
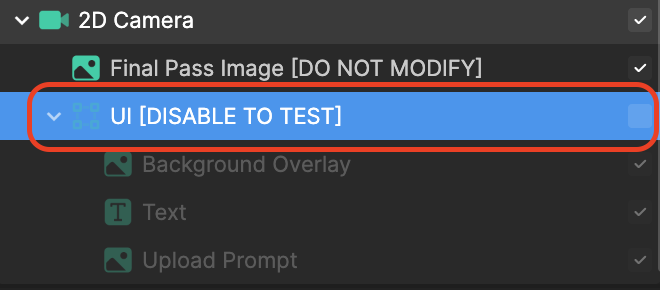
Start by deselecting the UI [DISABLE TO TEST] screen transform object in the Hierarchy panel.
The best way to test out your effect is to preview it directly in TikTok. Generate a QR code from Effect House, scan the QR code from your phone, and upload your own images!
The Background Overlay, Text, and Upload Prompt objects disappear from the preview.

Transitions
At the end of each image, a custom transition occurs, seamlessly making way to the next image. The transition type can be defined in Photo Slideshow Controller subgraph within the Visual Scripting panel.
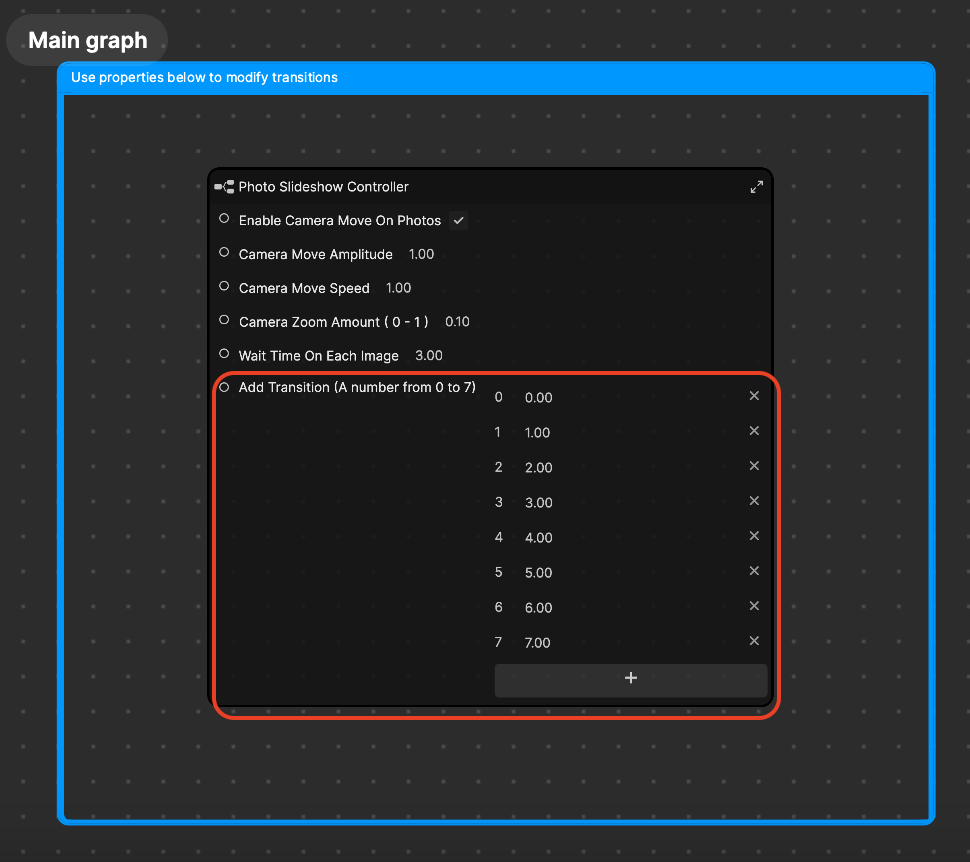
The Add Transition (A number from 0 to 7) property has seven fields, with 0 representing the first transition, 1 representing the second transition, and so on. The fields appear with numerical values between 0.00 to 7.00. So what do these values mean?
Well let's go back to the Hierarchy panel and find the Tip: Transition code (For Subgraph) render group.
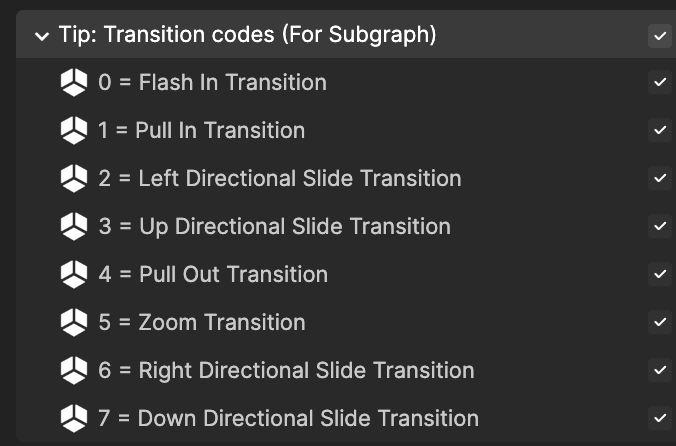
This render group outlines the values and their assigned transition type. For example, the transition between the first image and second image is Pull In Transition (value 1). Similarly, the transition between the second and third images is Left Directional Slide Transition (value 2). You can adjust these values to define the transition behavior you'd like!
If you want to reduce the number of transition types, you can go ahead and remove them from the Add Transition property by clicking the X button.
Visual Scripting
The following visual scripting properties in the Photo Slideshow Controller subgraph can be adjusted to customize the slideshow behavior:
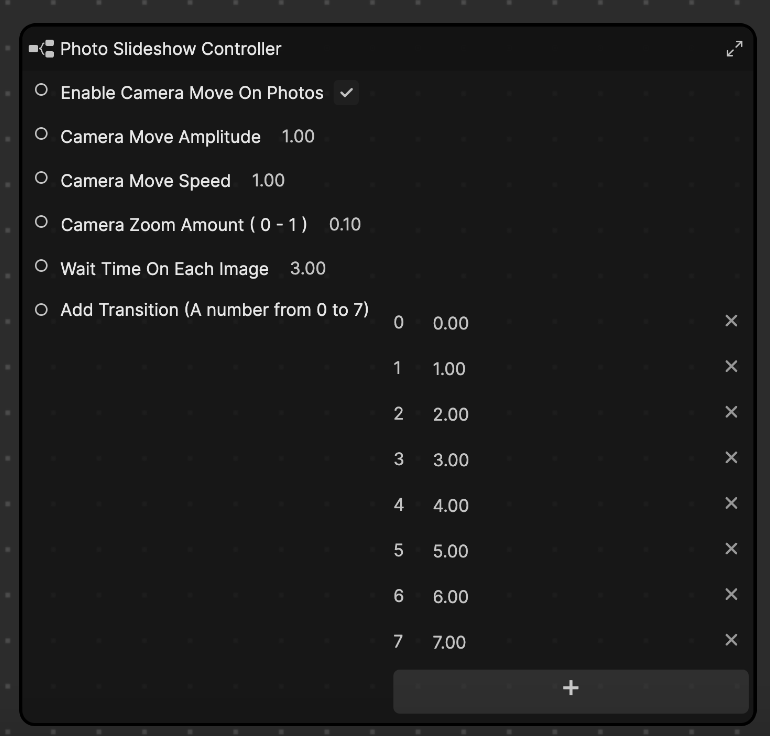
- Enable Camera Move On Photos creates a slight movement effect on your images. Deselecting this property will make all your images static.
- Camera Move Amplitude controls how much the camera moves on your images (when Enable Camera Move On Photos is enabled). A larger value causes bigger camera movement, and vice versa.
- Camera Move Speed controls how fast the camera moves on your images (when Enable Camera Move On Photos is enabled). A large value causes the camera to move faster, and vice versa.
- Camera Zoom Amount (0 - 1) controls the zoom ratio of the camera, with 0 offering no zoom, and 1 offering the most zoom
- Wait Time On Each Image determines how long an image is displayed, in seconds, before transitioning to the next image
- Add Transition (A number from 0 to 7) represents the array of image inputs and their respective transition types
Video Tutorial
To watch a video tutorial on how to use this template, go here.